- vRA & UCSD Part 1
- vRA & UCSD Part 2
- vRA & UCSD Part 3
OK this is definitely the meatiest part of this series, but bear with me and we’ll get through it. Before we get started, it is important to note there are a million different ways to skin this cat in vRO. This is just one that I find to be fairly straightforward.
I will also fully disclose that this is not easy and at times very frustrating. Some of the vRO stuff is well documented, but some of it is behind curtains and seems to be (on some level or another) different than some of the provided API documentation. I say that just to say, if you are getting your angryface on while working through some of this, you are not alone. Hopefully this series will help alleviate some of that frustration!
I’m not going to go into accessing vRO as there are already resources for it. Just note that I’m logged in as an administrator to the embedded vRO instance in my vRA environment, and have the ability to execute and modify/create new workflows.
Also be aware that I’m doing this as a lab exercise and am not doing things that you would likely want to do in a production environment, like error checking and detailed logging. I.e. is UCSD actually online and available? You can add as many extras to it as you want after the initial development.
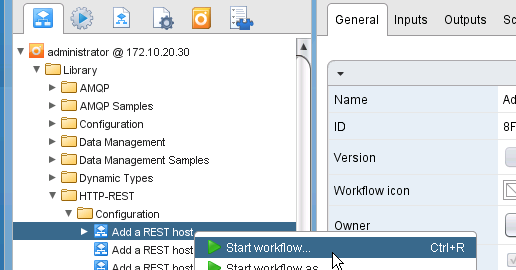
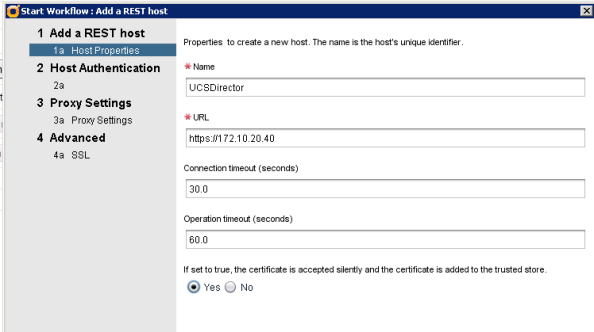
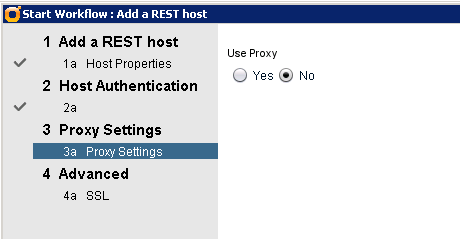
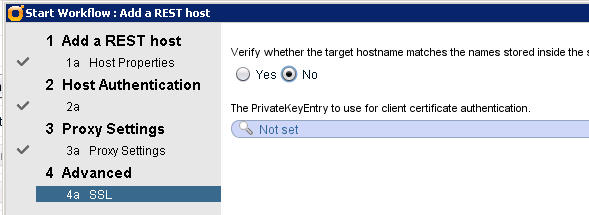
Add REST Host
First, we need to add UCSD as a REST host in the environment. This is done by executing the Add a REST Host workflow. I’m showing you all the settings I use. You may need to change some, but be particularly careful with the certificate/SSL setting. In my lab the certificates are all selfsigned so using the enhanced security settings didn’t work for me.

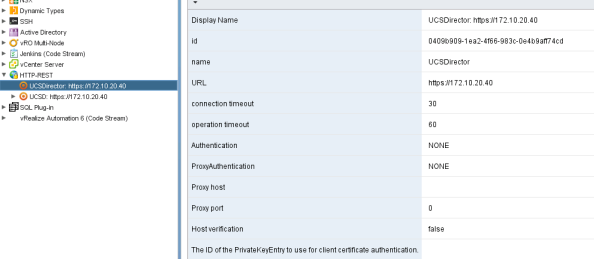
On the Inventory tab, you can now see the entity under HTTP-REST. Ensure that your settings look like they should based on your input. Also see that I actually have a duplicate of UCSD from previous development. This is fine (even if they are named the same, as they go by IDs in workflows), but you likely will only need or want one host entry per “thing” you are interacting with. Also for the sake of your sanity and the admins that will take over your responsibilities later, don’t use duplicate names. 🙂
Invoke REST Host
Next I’m going to leverage the Invoke REST Host workflow. Know that you can also add an operation to the REST Host if you want and then you would need to use Invoke REST Operation. Remember, like I said, a ton of different ways to tackle this problem but don’t use the Invoke REST Operation workflow if you are following along here.
Here is how I configured the invoke. I chose my host I just entered in, then put in the rest of the URL. Keep in mind whether your host ends with a slash as to whether your URL will need to begin with a slash.
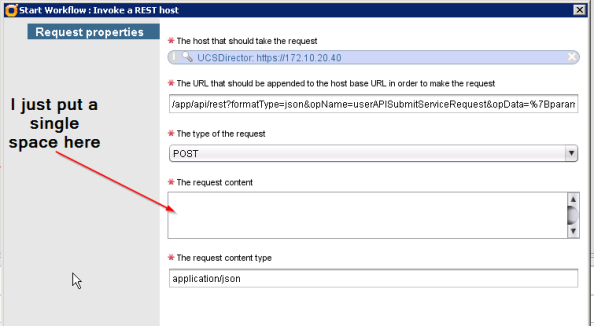
Also you can see the %7B near the end of the URL in the screenshot- I went ahead and properly encoded the URL and swapped the quotes to singles so it looks like:
/app/api/rest?formatType=json&opName=userAPISubmitServiceRequest&opData=%7Bparam0:'CreateVM',param1:'HomeLab',param2:1,param3:-1,param4:1,param5:'Provisioning%20VM%20from%20vRA'%7D
I just put a single space in the request content because it makes you (since it is technically a POST), but for us here the URL is the key.
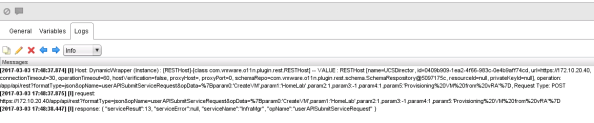
Let’s check out the response:

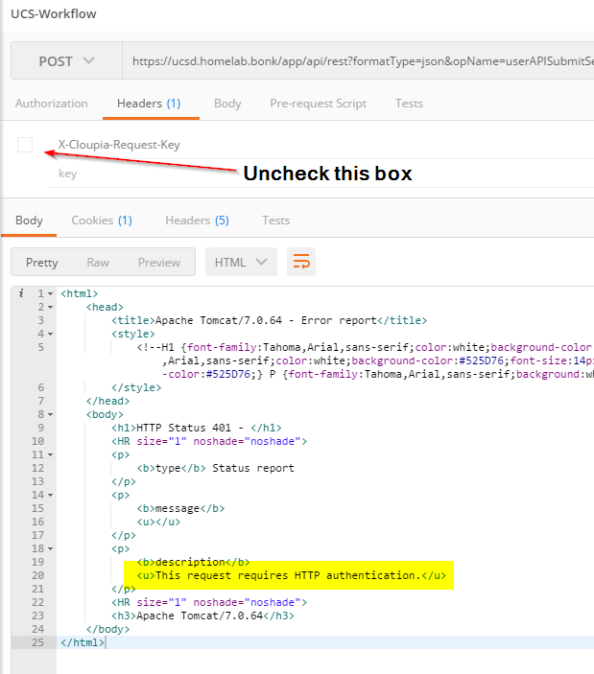
Kind of an eyechart, but some good and bad. We did actually get a response from UCSD so hooray on that end. However, it is saying it requires http authentication? Any guesses? Yep, it’s the header key. Note that nowhere in our invoke here did we specify our X-Cloupia-Request-Key like we did in Postman, so UCSD (as one would hope) is asking us, “who exactly are you and what are you doing here?”
In fact if you fire up Postman and deselect the Request Key header, you’ll see the same response:
OK so we need to accomplish two things.
First, we need to obviously be able to add in the key so that our workflow actually executes in UCSD. Just a minor detail, right?
Next, we need to “pretty” up a custom workflow because when we expose this to vRA I don’t want a user to have to type in that unbearably long URL. I just want them to click the button and boom, VM appears.
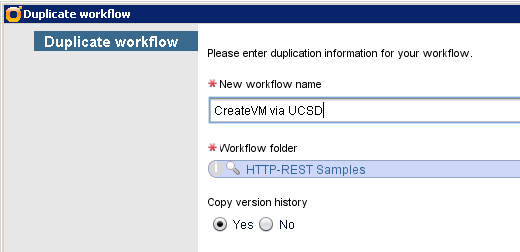
Duplicate and Customize
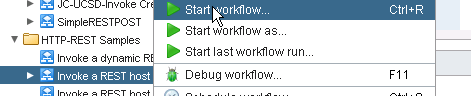
First, I’m going to duplicate the Invoke workflow into my own custom entity. Right click the Invoke workflow and choose duplicate.
Now edit this new workflow.
It is a good idea at this point to take a look at the script code itself, just so we have an idea of what’s going on behind the scenes. Select the Schema tab and the script inside and look at the Scripting tab on the bottom. In this case here is what we have:
System.log("Host: " + restHost + ", operation: " + operationUrl + ", Request Type: " + requestType.name);
var request = restHost.createRequest(requestType, operationUrl, requestContent);
System.log("request: " + request.fullUrl);
var response = request.execute();
System.log("response: " + response.contentAsString);
result = new Properties();
result.put("statusCode", response.statusCode);
result.put("contentLength", response.contentLength);
result.put("headers", response.getAllHeaders());
result.put("contentAsString", response.contentAsString);
OK so logging first. Then we create the request using the restHost that we added earlier. Then more logging, execute the request, aaaaand more logging/return value. Pretty simple.
Next I want to take a look at the input parameters that the script is using, as these are some of what the user is being asked to input when we run it.
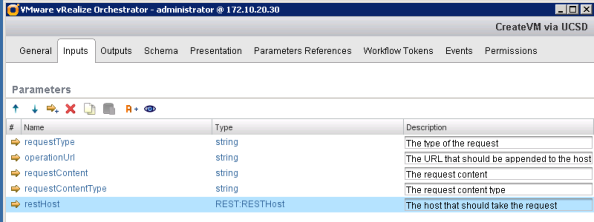
The highlighted “restHost” item is the only thing that isn’t a string. In general strings are super easy to duplicate inside a script but that restHost value is not.
The first thing I want to change is move the RESTHost input parameter to an attribute. This will allow me to easily change the value to a default and I can select the RESTHost I want. Right click restHost, select Move As Attribute, then go to the general tab.
If you look near the bottom at the attributes you’ll see the RESTHost exists but the value is not set. Click the “Not Set” text and you can pick the UCSD object from a list. It should now look something like this:

One down, four to go.
You can certainly move the other parameters to attributes as well and do the same, but I prefer to just kill them and define them in script for this particular exercise. The choice is up to you and how you want to extend your workflows later.
Under Inputs I remove the rest of the parameters, and then under Schema, bottom panel, IN I remove them again.
Back on the scripting page you’ll probably notice that those parameters are no longer a gorgeous pink but instead have turned a dull black. This is because they are no longer bound to the workflow and must be defined and manipulated in the code itself.
This should take care of the input part of our issue. The next one is, how do we get that darn key in there?
On the left side of the scripting tab is a nice reference panel. Since we are looking at a REST request, let’s look at that now. Scroll way down the bottom for the REST section.
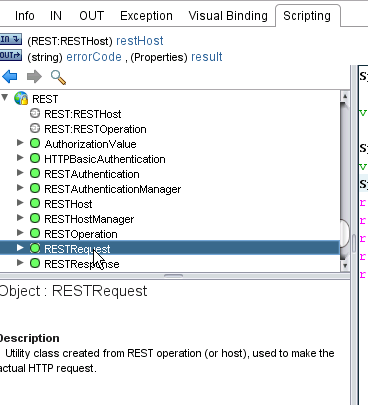
Expand out the RESTRequest section and you’ll find just what we are looking for – a setHeader method. It takes two string values, one for header name and one for header value. Sound familiar?
I’m going to update the code to leverage this along with my key. I’m also going to clean up an (ahem) typo, as well as remove the unused variables from this workflow. I could actually remove the result as well but I’ll leave it just in case. Here is what I’m left with.
var operationUrl = "/app/api/rest?formatType=json&opName=userAPISubmitServiceRequest&opData=%7Bparam0:'CreateVM',param1:'HomeLab',param2:1,param3:-1,param4:1,param5:'Provisioning%20VM%20from%20vRA'%7D"
var requestType = "POST"
System.log("Host: " + restHost + ", operation: " + operationUrl + ", Request Type: " + requestType);
var request = restHost.createRequest(requestType, operationUrl);
request.setHeader("X-Cloupia-Request-Key","31E0EABFC37D476CBDC50CEC6B66E454");
System.log("request: " + request.fullUrl);
var response = request.execute();
System.log("response: " + response.contentAsString);
result = new Properties();
result.put("statusCode", response.statusCode);
result.put("contentLength", response.contentLength);
result.put("headers", response.getAllHeaders());
result.put("contentAsString", response.contentAsString);
This time when I run the workflow I see a familiar response.
And there it is in UCSD:

In the final post we will cover how to consume this workflow in vRA so that we can expose it in a catalog.
